Showing posts with label Arcade. Show all posts

Wednesday, 20 May 2020

Day 58: Crack Down (Amiga)

A rare outing for my Amiga 600 as I continue to play one title a day from my 585 game backlog during UK lockdown...


Crack Down for the Amiga
Previous days' entries can be read HERE

You may have noticed that in this little intro section for these posts I sometimes like to give a background of the game in hand. Whether that’s on the development of the game, or it’s journey to my collection, I’ve always have a habit of ‘setting the scene’ and I hope you’ll indulge me at least one more time:

I first came to own this game, and a Commodore Amiga, when an old work colleague asked if I’d like some old computers he had, as he was clearing out to move abroad. 
These ‘old computers’ turned out to be an Atari 400 and an Amiga 500. 
In the collection of software for latter was, of course, Crack Down.

It was never my intention but I actually ended up selling both machines. 
The Atari was non-functional beyond my skills to repair, but the Amiga 500 was just too big for any of the 4 different games rooms I’d had set up while I owned it, so I sold it and used the proceeds to pay for repairs to an Amiga 600 I had picked up for a tenner at a boot sale in the intervening years.

Wednesday, 20 June 2018

A-Z of MAME Hidden Gems - Y and Z are for...


After starting off way back in 2014 I recently discovered that I never finished my A-Z of MAME Hidden Gems - I only got as far as V... I was pretty annoyed with myself and resolved to knuckle down and get those last four letters squared away.

W and X were covered in the last post, which just leaves me with Y & Z...

If you'd have told me that Y would be by far the most difficult letter to find hidden gems for I wouldn't have believed you. Z I expected to be awkward by Y's just not a letter I'd think of in the same way... if I'd even considered it at all.

And yet, here I have just one game for 'Y', a game I'm listing under it's bootleg name that probably wouldn't have made it into the top ten choices for any other letter:


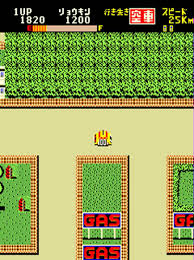
Yellow Cab


It's not that Yellow Cab (better known as Kamikaze Cabbie) is a bad game - it's from Data East after all and I'm pretty sure they don't know how to make bad games - it's just more 'interesting' than 'excellent'.

Played on a large overhead map the main goal of the game is to pick up a passenger in your cab and take them to another point on the map. From that you may infer that the game is a precursor to Crazy Taxi, but in fact it feels much more like the original Grand Theft Auto.

It's hectic fun and has some extra depth added by the presence of the police and the need to refuel regularly. Despite the my somewhat negative tone here it's well worth a play, but if I was to rank all the games I've covered over the course of this series it would definitely be nearer the bottom than the top.


And so, finally, after four years of intermittent blogging, playing, building, and configuring controls in the tab menu, I've reached the end. It's somehow fitting that this whole thing should finish with that most ubiquitous of hidden gem genres; the vertical shooter.


Zaviga


If you have read many of the other entries in this blog you'll know that I'm far from immune to the charms of a good gimmick.

Zaviga, (like Yellow Cab released in 1984 by Data East) is a vertical shooter whos gimmick is that it takes place both in the air as a jet fighter and on the ground as tank.
The game allows you to switch between the two at will and, from the little I've played, seems to scroll infidelity on a loop, with the enemies getting a little harder each time.

It's fair to say that, being quite an early game Zaviga isn't particularly blessed with complexities.

But complexities was never what this endeavour was about.

Hidden gems remain hidden because at first glance they may look simple, they may seem derivative or dated - but dig a little below the surface and you reveal a game that makes you happy, makes you nostalgic, or just makes you wish you hadn't overlooked it so many times before.

Zaviga captures all that brilliantly.

It may not be as gob-smacking as Boogie Wings, as surprising as Change Air Blade, or as awe-inspiring as Outfoxies... but it has charm in abundance. And really, at the end of the day, what more could you ask for than that?

Tuesday, 19 June 2018

A-Z of MAME Hidden gems - W and X are for...

So it's been a while...

One of the many things I enjoy about videogames is talking about them online and, unsurprisingly, the subject of MAME often comes up.

This happened recently when I pointed someone who was asking about lesser known arcade classics on the r/retrogaming sub-reddit to this very blog.

As part of the ensuing conversation they suggested I turn this weary old text dump into a nice new, easy to navigate database.Great idea, I thought, and immediately set to work...

A few days later I discovered that I never finished my A-Z of MAME Hidden Gems - I only got as far as V... I was pretty annoyed with myself and resolved to knuckle down and get those last four letters squared away - and that brings us to right now.

So first up, a fighter from the Capcom stable that has nonetheless remained somewhat hidden:
War-Zard


Okay so, full disclosure: Way (way) back when I was writing up the recommendations for 'R' I found this game under it's western title of 'Red Planet' - Knowing that the options for 'W' were likely to be very limited I tucked it away to unearth at the very moment.

It's worth the wait though!

War-Zard is primarily a fighter and, coming from this particular era of Capcom, you can be sure it has all the qualities you would expect.
The art is stunning, the character design is ingenious, and the special moves are very familiar.
With that said, the single player campaign of War-Zard goes far beyond that normally found in an arcade fighter.

Named 'Quest Mode' a lone player chooses one of the four main characters and proceeds to do battle against a wave of CPU controlled bosses.
Furthermore, items can be collected during fights that provide buffs and experience points are also gained that can be used to level up your chosen combatant.

It's pretty much the perfect fighter to play at home, at even includes a password system to pick up where you left off - which makes it all the stranger that this is the only CPS III game that Capcom made that never got ported to a home console or PC.


And if you think not getting a home release keeps a game under the radar, this next one never actually got a release in the arcades:
Wing Force


The story goes that this prototype game was lost forever until a PCB was found, bought for a considerable sum, and then (very generously) dumped to MAME so it could be enjoyed by all.
You can read all about it on this archived thread from the Shmups form: https://shmups.system11.org/viewtopic.php?p=1155828#p1155828

It would have been a shame to lose Wing Force as it's a great little game. Very much in the Raiden mode it features wonderful animation and very smart craft design - with each power-up physically changing it's appearance.

Even without the intriguing back story this would still be well worth your time.

Onto to 'X', and more shooters, firstly:
X-Multiply


Being a horizontal shooter from Irem, X-Multiply is never going to avoid comparison to R-Type.
With a plot based on the cellular occupation of a woman by a microscopic alien force it would appear that the developers were keen to draw the line under their seminal genre example - but in truth niether this nor the organic style of the enemies and environments really manages to create any distance between the two games.

Luckily the ship design and unusual play style it generates more than make up for it.
Your craft has two tentacles that extend up and down from the hull, on the ends of which the weapons are mounted. These mechanical arms move fluidly around your ship as you manoeuvre through the levels and are impervious to enemy fire.

This makes for a great balance of offence and defence and you learn to shift seamlessly from positioning the arms for the best offensive alignment to ensuring they are a well place barrier between you and enemy fire.

Finally for today, a game that follows on the X-Multiply not just on this page, but in the evolution of weapon design.
Xexex


Despite coming from Konami Xexex actually looks and plays more like R-Type than X-Multiply ever did.
In a fair and just world a game that so blatantly steals all its best ideas from elsewhere wuldn't be any fun to play - luckily for us that isn't the case!

Xexex takes the tentacles from X-Multiply, adds a third arm, and then attaches the whole thing to a force orb.

Lets not pretend this is a life-altering innovation - but it offers just enough to make itself well worthy of inclusion here.

See you next time for 'Y' and 'Z'.

Monday, 26 June 2017

Setting down my tools...

So I guess this is it.

After three years, four locations, and five (or was it six?) CRT monitors I've finally completed my quest.

I own a working bartop MAME cabinet that was built, in its entirety, for under £50.

And here she is:


First things first, a breakdown of the costs.

£00.00 - MDF: Donated by my boss
£00.00 - Screws and fixings: I do a lot of working with wood so my stocks are usually high
£00.00 - Glass: 'Re-purposed' from an old picture frame
£00.00 - Paint: Leftover from renovating an old chair
£00.00 - PC: Sourced from an old business acquaintance
£00.00 - Monitor: From Freegle
£00.00 - Speakers (Stereo): From Freegle, an added bonus with the monitor
£00.00 - Speaker (Single): A spare I had knocking around that some extra bass
£00.00 - Cooling fans: Recovered from an old laptop tray
£00.00 - LED Power button: Gift from +Dave Whiffin the guy I can blame this whole project on
£00.00 - GTX750 Graphics card: An unexpected, last minute, bonus addition - see below for more
£05.10 - Paint Primer: A necessary expense to get a decent finish when using MDF
£13.18 - Joystick and Buttons: From Ultracabs
£10.18 - USB controller for controls: From Ebay
£04.17 - Amplifier: From Ebay

£05.50 - Total Shipping

£38.13 - Total

I should have said under £40 - just to give it the James Bond finish.

You can see that, with the exception of the primer, all the costs can be attributed to items that are very specific to this kind of project. Everthing else is either more standard or re-purposed from bits and pieces I had lying around.

I should also mention that the listed cost for the amp is for a replacement. The original was £6.99 but I blew it up trying to figure out how to power it from the motherboard.
So although the above is the true value of parts that made it into the final build, you can add the extra seven quid to the cost of making it if you're feeling harsh.

The final push to finish was fairly straightforward. I had the whole thing assembled and finished for a day when a friend mentioned in passing that he'd found a stash of old graphics cards while moving and offered me the best of them - a GTX 750. So everything had to come apart again to fit that - but there was a fortunate bi-product of this.


Previously I had a couple of small conundrums with the fans I fitted to the rear of the cabinet.
Firstly, the usb power cable wasn't long enough. Fortunately a quick rummage in my cables box turned up a short extension lead; problem solved.

Secondly, it turned out the fans stayed on even after the machine was powered down.
After trying different sockets and playing with the power management settings in Windows to no avail I googled the issue.
Apparently this is a standard feature and most people, those that weren't saying something a bout a jumper, suggested a bios update and a tweak to the settings within.
My bios was up to date. I played with the settings I could find: No luck. The fans still purred away when the power was off.

I resolved that I'd just have to power off at the switch whenever possible. A less than ideal solution.

Fitting the graphics card was the first time I'd really looked at the motherboard since first attaching the power button years before. I had to fiddle with the clamp holding the cards in place and in doing so dropped the tiny screw that held it in place. It nestled on the mothered next to tiny jumper. I picked up the screw and the words 'USB 5v' were etched underneath.

So, having moved the jumper from the second and third pins to the first and second I now have cooling fans that power up and down when the rest of the machine does.

The final hurdle was cleared.

The machine was reassembled.


The project was finished!


So what's next?

Well. My father in law gave me a PC steering wheel and peddles a while ago. They're stored away somewhere, never used.

I'm thinking I might - with the budget restriction now lifted - build a pedestal for the unit and build them into it... we'll see.

But for now this last picture is for +Jeremy Riley - the closest thing you'll get to a "big grinning selfie" from me. Cheers for the support along the way!

Monday, 5 June 2017

Setting up the controls... for realsies!

 As I said last time; the next part of the construction was to assemble the control deck proper.

I’d had the majority of the buttons attached to a random lump of timber I had kicking around from way back when they were first delivered – this had allowed me to test out some games and better understand what I wanted from the button layout.

Check out this old post for more on that: http://mybudgetmame.blogspot.co.uk/2013/10/setting-up-test-rig.html

Now, with the paint fully dry on new deck, it was time to remove them from the prototype and into position on the real deal.

I’m not going to lie: This felt like a big moment.


I don’t think I could possibly be happier with the way it looks. The red looks class against the dark grey mid-sheen finish and it just in general looks the real deal.

Some initial concerns about cramped connection were allayed by pointing the terminals of the back row though the gaps of those in the front.


I’m fairly sure I don’t have them connected up in the same order as before but that’s a simple fix in the MAME configuration when it comes to it. Need to screw that pcb to the case somewhere too but that's no problem either.

So only one thing left to do - put the pieces I have together...


Now that's proper progress right there!

Thursday, 1 June 2017

Setting up a guide-jig...


With the three smaller sections of the front of cabinet all painted up and finished I gave the same treatment (Sand > Seal > Prime > Sand > Paint > Paint) to the main frame.
Considering it had been in a bulky, part-built state in the in-laws garage for 3 years it was remarkably free of damage.


The two layers of MDF I had glued together to use for sides were coming apart very slightly in a couple of places but nothing that didn’t disappear under three coats of paint.
This left just the main speaker and housing unfinished and, truth be told, generally in a bit of a mess.
 
Previously I had mounted the speaker into a piece of MDF and given it a coat of primer.
It looked pretty tatty but worse still it seemed as though the paint that had been in holes of the mesh had fallen through and dried solid – give it a shake and it sounded like it was half full of rice – not good.
 
I made the rather drastic decision to open up the speaker front and shake the bits out – I started with a drill hole but struggled to get much joy. So I resorted to the tin-snips.


Obviously this meant I had to do something about the new mess I’d made. The free sample of speaker cloth I got for the smaller speakers was quite a course weave, so to match it I cut a square from a hessian shopping bag and attacked it with the some leftover black paint I found in a tester pot tucked away in one the better half’s craft drawers.
 
Finally, I needed to create a new, neat front plate.
At some point in the preceding three years the remainder of my MDF stash has taken some water damage. Luckily I found a couple of pieces that were big enough but, at only 5mm thick, I was presented with a new problem when it came to routing a neat finish as the routing bit guide wheel is 3mm on its own.
I tried cutting a square out, clamping extra MDF as a guide underneath, and routing around both -  but there was too much movement and the result was a total disaster.

Plan B was to build a guide jig using two scraps of MDF and my workmate.


With the piece of MDF for the panel clamped firmly on top of this I drilled a hole big enough for the router bit through the centre and then ran the router out to the edge and followed the guide-jig around.
It was quick, easy, and worked perfectly.
 
After the usual prep and paint it was simple case of assembling the pieces and standing back and admiring the results.
The whole affair felt like a victory – just the sort of win I need to keep me moving forward.


Next up – getting that control deck together.

Wednesday, 31 May 2017

Setting up for the big finish

So I figured a quick "Previously on..." was in order, thanks to the big gap in posts.

The aim was to build a M.A.M.E. Bartop arcade cabinet for less than £50. The cabinet, the computer, the screen; the works.

I already had wood glue, the paint for the final finish, an array of tools, various screws and fixings, and a cool led power button donated by my mate Dave.

When it came to major components I then - through Freegle, fortune, and foraging - had managed to get the 14" CRT screen, a pile of MDF scraps, and an old PC at no further cost whatsoever.
With my £50 budget still not touched I still had to acquire a set of controls, some sort of audio system, undercoat for the paint, and anything else unexpected that might come up.


My theoretical costs broke down like this:
  • £15 for a Joystick and Button pack from Ultracabs.
  • £10 for a USB encoder for the Joystick and Button from eBay
  • £8 for amplified speakers
  • £10 for hard finishing filler
  • £7 F-factor

But in actuality the budget has ended up looking like this:
  • £11.99 Joystick/Buttons
  • £6.99 Amp
  • £1.19 single button
  • £10.18 for a USB encoder for the Joystick and Button from eBay
  • £4.17 amp from eBay
  • £5.50 total shipping

The hard finishing filler wasn't needed following the acquisition of the MDF and there are two amps because I blew the first one up. The rest of the sound system I put together from an old speaker I had kicking around and a pair of PC speakers that came as a bonus with one of the 4 CRT screens I sourced through Freegle.


And so we come to now, as the project wheezes back to life after a 3 year gap I still have just under a tenner to play with.

The first thing I need to add to that is primer. I'm not sure if I  mentioned it in previous posts or not but since a couple of the component parts already had a coat of this applied I must have bought it before 'the gap'. The open tin is also evidence of this.

I know I picked it up locally and checking online it's available in B&Q for £5.10 - so that's the number going into the budget.
That's £45.17 spent so far.

With the sunny spring evenings being one of the main drivers to restarting the project I began small.
I worked on the marquee section, the control deck, and the front panel.
I pulled the three sections of the marquee apart as I wasn't happy with the existing join. I re-glued an and left them clamped in my workbench overnight then sanded the join down the next day.

All the parts were first covered in glue-size to seal the MDF then I gave them a good coat of primer. When the primer was fully dry I sanded it back smooth with some 240g sandpaper.


It was nearly 10pm when I finished


Having researched what was required I was fully aware that an ultra-smooth mirror finish to my paint work was beyond both my budget and my skills - but I was very keen to have a quality finish.
I'd be using the remnants of a tin 'Slate' coloured paint that I had leftover from previous projects on some DVD racks and a posture chair. 
Experience has taught me that consistency is the key to making anything look well designed so I decided to roller the paint on - this would ensure the same finish all over and eliminate any opportunity for ugly brush marks.

After a couple of quotes I'm very pleased with the results, roller fluff was a bit of a problem but not a big one and the colour - once fully dry - is a pretty stylish dark grey.

The marquee, front panel, and control deck drying amongst the chaos of my shed

Next up, a little sub-section assembly.


Sunday, 3 August 2014

Setting a precedent...

So yeah, on Friday night I broke another monitor...


...and by midday Sunday I have a replacement.


I had put the old monitor on top of that blue bin while a rubbed down my sized MDF. I was just finished and stepped back to take a picture of my handy-work and... well... you can see what happened next.


I said this very early on in this project but it bears repeating: Freegle is your friend.

In desperation after this latest calamity I checked every available option:

Ebay - Two 14" monitors listed, the closest being in Nottingham (200 miles away) with a £10 'collection only' price

Friday Ads - Closest was Kent (50 miles), only wanted a fiver but wasn't sure it worked, also, possibly 17".

Gumtree - Nothing. Not a single CRT monitor listed in the area.

Local paper - Nothing.

Freecycle - Posted on Friday night, heard nothing as of time of writing.

But Freegle... on Freegle I had a response less than 24hrs after I posted my 'Wanted' ad and I had collected the new monitor, from a guy who lives 6 miles away, less than 12 hours after that. My sixth monitor (I think, I have genuinely lost count). All from Freegle.

Also, the guy also gave me these as a bonus:


I'm not actually sure I'm going to be able to use these - certainly not in their current form anyway - but I'm going to pry them apart and seeing if it's worth doing anything with the innards - it would be nice to have stereo sound after all, albeit with the slightly bittersweet realisation that I would have wasted more than a tenner on amps... We'll see.

I haven't been back to the garage to check how the new monitor fits in my skeleton cabinet yet but all signs point to it being pretty much a like-for-like replacement. I know it's exactly the same width - and that alone means that it's very unlikely I'll need to any fundamental rebuilding. Which is a great result.

That's all I have for now. After I broke the monitor I went inside and sulked for the rest of the evening, so in real terms I haven't really made any progress - even though it feels like I've dodged a bit of a bullet.

Tuesday, 29 July 2014

MAME Hidden gems - U & V are for...


Have you ever noticed how American TV shows tend to have 'themes' in each episode?
One entry may have every character, no matter how unrelated, dealing with issues regarding 'Trust', still another may centre it's weekly adventure around the theme of 'Death'.

Well, today's blog update is bought to you by the letters U and V and the theme of 'Detail'.

I wanted to included Vindicators in this selection. It would have provided the perfect opportunity for me to bang on about how I feel the layout I designed for my MAME cabinet’s buttons allows me to use the top four as a pseudo-dpad – facilitating great control for games such as Atari’s rather smart dual stick tank game.

Unfortunately, with multiple ports and re-releases under its belt, it’s just too well known.
Give it a look if it did manage to pass you by.

So instead I’ll begin with Undercover Cops, a brawler from Irem, the company most famous for the classic shooter R-Type.


Although the usual genre tropes are all present and correct (Three characters, walk right, pick up weapons, etc) Undercover Cops will immediately put anyone that plays it in mind of the Metal Slug games.
The style here shares that series’ distinctive, drab coloured, ultra detailed sprite and background design, so it was no surprise at all to learn, during a little research, that it also shares some creative team members with that series’ too. 

I’ve probably said before that with brawlers the inventiveness of levels and bosses is really brought to the fore.
The first level boss in Undercover Cops is a prime example of this. After you have knocked off about half of his energy bar he moves towards a giant stampy, crushy, factory machine thing - and attempts to get you under it. Brilliantly, if you turn the tables on his plan, you can terminate him in a single well timed attack. 

There’s only so much you can do with jump, kick, and an 8 way stick (hey, that rhymes!) but Undercover Cops shows just how much taking care of the details really makes a difference and elevates this brawler from just another Final Fight clone to a contender for best in genre.


Voltage Fighter Gowcaizer (I can’t stop reading that as Cow-gazer) is a fighter that excels with a single mechanic.


If you remember Bloodstorm, the game was marketed as a ‘Mortal Kombat Killer’ by Strata in 1994 you might also recall it’s one interesting feature – the Passable Power – whereby an ability could be taken from a defeated opponent and used by the victor.
Voltage Fighter Gowcaizer, an anime styled fighter released a year later, takes this idea and improves upon it – Mainly by implementing it in a game that isn’t utterly, utterly terrible.
It’s not the only reason to recommend Voltage Fighter Gowcaizer though. It’s a great looking game too, and one that benefits from not trying to re-invent the wheel with its move-sets.
It also retains a respectable level of balance, quite an achievement considering the aforementioned attack borrowing mechanic.


So we've had a brawler and a fighter so far - exactly zero-points for guessing what genre Viper Phase 1 comes from.


This V-schmup comes from the Raiden Stable is is pretty recognisable as such for anyone vaguely familiar with the series. 

As with all of my personal favourites in the genre, this is a game with a focus on shooting stuff first, and avoiding stuff second.
It gives you such beautiful stuff to shoot too. The intricacies of the designs are exceptional and, as you’d expect from a game with this pedigree, it plays like a dream.
It’s worth noting that there are two versions available. Purists might want to stick to the original but the imaginatively named ‘New Version’ features a better power-up system and, for me, that’s all important.


I’m going to squeeze in a quick forth entry with Violent Storm.


As I’ve already had a brawler that excels through its use of detail in this selection so I’ll be brief.
Violent Storm isn’t as pretty as Undercover Cops but a screenshot would never do this game justice even it was – because the music is completely amazing.
In true arcade style this is a game that must be played with the volume up.

During my brief research into the game I found this write-up from VG Junk – It’s a fantastic piece, and does the game far better credit than I ever could.

And, as I'm finished here for now, you can go read it.

Tuesday, 22 July 2014

Setting the size...

Did you ever make airfix models as a kid?

You'd open the pack and start glueing stuff together right away, ugly fingerprint smears of polystyrene cement all over the place, and half an hour later you'd have grey plastic aeroplane/tank/car with ugly ridges of glue and wonky wheels and maybe you'll paint it tomorrow?

That was me anyway. Only before I could paint them they'd always get stepped on out of clumsiness, spite, or nearsightedness by me, my brother, or my Nan respectively.

I knew, even then, that you were supposed to paint the pieces while they were still attached to the frame, to carefully remove them afterwards with a sharp knife (Under adult supervision). I knew this was the way you were supposed to do it but I just didn't have the patience.

I still don't. But with this project I'm somehow forcing myself.

Today I put the holes for the buttons in my control deck.


You may notice that's a slightly darker colour, more on that later.

If you saw the post I had on google+ regarding the button positions well, here you are; this was the winner.
Strange thing was, once the other holes were drilled this really was the only option - everything else just looked too cluttered.
Going to be a bit of squeeze with the wiring considering the angle of the deck but I think it'll be okay.
I'll probably put the 'Coin' on the right and the 'Start' on the left.

The temptation, at this point, to fit all the buttons, attach the deck to the skeleton cabinet, and play some Outfoxies was almost unbearable... but I managed... just.

I did this by distracting myself with the front panel.
Having unearthed my router from the bottom of the stash of my stuff that resides in the in-law's garage I set it up and tested using a scrap of MDF of the same thickness (10mm) that I'm using for the screen surround.

If you've ever used a router you'll know that setting the thing up is the most important step. Once you're all locked in with your blade height set and secured the rest pretty much takes care of itself - but it's still a little daunting when your MDF resources are oppressively restricted.

However, in this case, there was nothing to worry about.


I'm really pleased with how this came out, this is the kind of detail that will hopefully belie the cabinets meagre budget.
You may not be able to make it out on that picture but the router left a little lip all the way around.


As I set about sanding it down it occurred to me that I'd have to seal the edge somehow or it would look terrible when painted.

A little googling put me on to something called sizing, a mixture of PVA based wood glue and water that is used for the very purpose described above.


This small batch I knocked up had a ratio of about 5 parts water to 1 glue. There were all sorts of ratios recommended all over the internet, from 1/1 to 10/1 and everything in between. I settled on five because, well, it as good as anything else.

Then I went crazy with it.


There was just something in the way it looked that gave me total confidence that this was the right thing to do. I'll be giving it a light rub down, probably with wet-and-dry, before I put my undercoat on - which I'll need to buy first.

With both the front panel and the control deck nicely covered I left them to dry and that was the entire product of two hours work.

Probably going to do another batch and coat most of the unit next time out - but I need to check I have all the holes I need drilled and countersunk first.

Monday, 21 July 2014

MAME Hidden Gems - T is for...

Play Thunder Jaws. I'm not going to give it a slot here as any credibility I have left after recommending Pachinko Sexy Reaction would be lost forever. But yeah, play Thunder Jaws. It's like Russ Meyer and Ed Wood got together to make a rip off Rolling Thunder... neither having made a game before... Genius.

Onwards...

Tenkomori Shooting fuses v-shmup mechanics with the slightly mental quick-fire style of Bishi-Bashi Special - and if that sentence doesn't make you want to play it then I'm afraid we can't be friends.


The front end of the game has something to do with a monkey going up a tower and beating a Game of Death style challenge on each floor for some reason.

However, unlike a yellow jumpsuit clad Bruce Lee, your challenges are less about fighting ex-basketball players and more about achieving a high-score on a bite sized vertical shooting game.

There are Galaga clones and 1942 clones, there are games where you fire hearts at a singer and others where you fire arrows at apples, you will try to serve sushi and assassinate a Shogun, you will even have to blow up UFOs with fireworks.
Tenkomori Shooting is one of those turn-the-sound-up-and-revel-in-the-madness games and, for me, there is no higher recommendation.


I'm doing it again I'm afraid, Touki Densyou Angel Eyes is a game that is fairly well known in Japan.


It has had releases on the Saturn and the Playstation and is pretty common on the tournament fighting scene.
It is, however, pretty much unknown to the vast majority of western gameophiles.
Yes, I did just make up that word.

There's always a voice in my head telling me not to bother with listing fighters, they seem like a bit of a hard sell.
This example stood out to me initially for the quality of the characters and animation, and for the bizarre way it combines the 2D hand drawn sprites with pre-rendered 3D ones.

It's a bit of a jar at first, but when you start to play, the game's Street Fighter style controls come so naturally, and the games technicalities are so user friendly, that I could not fail to be won over by it.
I hope it does the same for you.


There have been a few games I've detailed in this blog that have put me in mind of Nintendo's classic StarFox, but none moreso than Thunder Ceptor.


A bit of a caveat to it's selection: The arcade cabinet featured an analogue joystick, as most MAME Cabinets tend to go for a 4 or 8 way digital stick it may be something to bear in mind if you're a stickler for the genuine arcade experience.
But, as I've said before, the vast majority of people use MAME on a PC controlled with an Xbox 360 controller, so there's no problem there.

Anyway, Thunder Ceptor is an into the screen on rails sprite scaling shooter. It has more than a little in common with Space Harrier and while it doesn't really do enough to move itself out of the shadow of Yu Suzuki's masterpiece (how could it?) it has enough differences to make it worth your time.

Principle among these is the fuel meter. Rather than having lives, Thunder Ceptor instead puts you on the clock, challenging you to complete the level before your fuel runs out.
This overtone of the racing genre if further supported by inclusion of an accelerator alongside the usual shooting controls. Fortunately, none of the levels have corners, so steering is not required, otherwise we'd be into full on SCI territory.

There is a sequel to the game that was released less than a year after the first game called 3D Thunder Ceptor II, it featured stereoscopic 3D and power-ups but little else to recommend it over this original version. MAME does replicate the display by splitting the screen but for me this is just another reason to play the original... unless it appears on Oculus Rift, that is.


There were a couple of other games I decided against this time out:
Typhoon is a game I remember playing back in the day but I couldn't really recommend it on nostalgia alone, and Twinkle Star Sprites is a fusion of shooter and two-player Puzzle Bobble who's mechanics just seemed to elude me, the limitations of single player weren't in it's favour either.
Give them both a look though, if only a cursory one.

Monday, 14 July 2014

Setting the viewing angle...

Okay so last time out I'd just done a rough cut on the side panels and was waiting for the glue to dry - obviously that has happened now so the next step was to take the screws out and fill the holes.
I don't expect anyone to remember that I had originally set aside £9.99 to replenish my two part wood filler.
However, as a knock on effect of managing to get hold of some MDF I won't need any more filler, and the little I had left over from my furniture experiments served very well for patching up these panels, with some to spare.


I've only done a quick sand down and shaping of the corners so far. I'll get out the wet and dry to give it a nice smooth finish - and get rid of the loose fibres from the MDF - when I have all the other elements ready.

With the sides as done as they need to be I turned my attention to the cross pieces needed to support the screen.

The one at the front was simple. It sits on top of the PC cabinet and I'd already used it to get the angle for the screen so it was just a case of screwing it in place.
There was the hint of a split developing so I've poured a healthy amount of PVA into the wood to try and prevent it worsening. Happily, the splits weren't in the structurally significant direction.

The back support needed a little more work.
With the tilt of the screen I needed to find a way to prevent it sliding backwards. I decided to keep it simple.


When everything is ready to be 'locked-in' I'm going to put screws through the side MDF pieces and into the screen casing to make extra sure it stays in place.

With that done, I've onto the front panel.

I only had one partial sheet of the 10mm MDF that I wanted to use, so after cutting it the right width (365mm) I decided to cut my window plum centre.
This gives me the most leeway for repositioning. I'm thinking that I probably won't cut it down until I have the control deck in place.
I measured out the dimension of the screen, allowing for a 5mm overhang all the way around.
After drilling a 28mm hole at each corner I broke out my trusty Stanley knife saw and cut out the centre piece.


A little finishing off with a bastard file and voilà. I'm going to put a 45mm bezel on it with a router eventually, but for now it serves the purpose of making me feel like progress is being made.


Next up is the control deck. 
You may have seen on Google+ that I've been finalising the layout plans with a little help from contributors on there. 

Next time out I'll putting their good advice into practice.

Friday, 11 July 2014

MAME Hidden Gems - S is for...

A quick run down of the nearly men before I get into the top 3 for 'S'...

Space Fury is a vector shooter in the asteroids style. It has a cool powerup system and looks great, but not only was it released as an unlockable on one Sega's myriad collections, but it also stops calculating the score after level 4, which annoyed me.
Suprise Attack is a game in the style of Rolling Thunder but set in space. Again it has some pretty neat power-ups but doesn't really do enough to stand out in the glut of this type of game.
Super Cross II is a very simplistic isometric motocross game, a little too simplistic to make the cut unfortunately. But it does offer a fun few minutes diversion and the sprites are impressive considering it's age.
Finally, Shock Troopers - 2nd Squad is another game that has seen fairly recent re-release. This evolution of the Commando/Ikari Warriors style shooter is definitely worth a look if you're unfamiliar.


Now, if you're anything like me you'll look at the screenshot below and think:
"That looks like a rather smart late 80's racer, got to be worth a look!"

This game is called Slipstream, just 150 prototypes were made by Capcom and it never entered full production.
According to the very helpful Arcade-History.com this makes it one of the rarest arcade machines of all time.

It's fast, fun, features three game modes and a neat boost gimmick based around staying in an opponents Slipstream. So what went wrong?


It was 1995.

To put it in perspective, that's a year after Sega Rally came out, 2 years after both Ridge Racer and Daytona USA first saw the light of day.

On the day it rolled off the production line, Slipstream was already old-hat. The spite scaling graphics rendering it an impossible sell to a market into which Sega and Namco were unleashing some of the most exhilarating driving experiences the arcades have ever seen.

However, playing the game now, unhindered by juxtaposition to such behemoths, its four brilliantly realised tracks, 9 cars, and OTT boost mechanic make for a game that has aged very well and is a joy to play.


When I played The Super Spy I didn't make it as far as this boss...


So I can't tell you if it's supposed to be a woman or a guy in drag, although looking at the size of those hands...

The Super Spy is an example of a lifeline that has helped me out of a spot with these entries more times than I can remember - A Neo Geo game.
There always seems to be something a bit mental about games on SNK's wildly expensive hardware, and that makes them a perfect fit for this blog.

This particular effort could lazily be described as Operation Wolf with fewer guns, but it reminded me most of the Aliens game released for ZX Spectrum, C64, Amstrad, and the like back in 1987.


As with Aliens, you control the movement from the first person perspective and move predominantly sideways, only occasionally being able to move 'forwards' through doors.
However, in Super Spy, you eventually come to a lift and entering it takes you, literally, to the next level. 

Each floor is crammed with an array of bad guys for you to despatch in a variety of ways.
You start with a pretty effective knife, however the power of this weapon reduces with each use.
You can also pick up a pistol that will despatch most enemies in one or two shots, but uses ammo very quickly. 
At some points a rescued hostage will even give you an insanely powerful but limited use machine gun.
The initial weapons, though, are you hands and feet. And this is what earns The Super Spy a place on this list.

The game features an incredibly in depth combat system that almost seems out of place alongside some of the other, somewhat rudimentary, elements.
It allows you to bob, weave, throw jabs, hooks, uppercuts, straight kicks, and knee bombs. It even has a timing based block mechanic.
It may not sound like much when described here, but when you take the time to fully understand the minutiae of the system it becomes immensely satisfying.


Luckily for me, following its arcade release Sōkyūgurentai made its way to some of the 6th generation consoles, but never outside Japan. 
Sometimes it feels churlish to be grateful that so few people have played these games - particularly when they s wonderful as this... but I'll get over it.


Often described as a spiritual successor to Rayforce, Sōkyūgurentai is a sprite based v-shmup that features a version of the lock-on mechanic that is synonymous with that series.

Considering the lack of true 3D the game has an incredible sense of depth. 
It's in view of this that the lock-on targeting system on each of the 3 available spacecraft is cone-shaped, each slight variation capturing all enemies that pass through it no matter their location on the pseudo 3D plane.

In the vein of the very best V-shmups, of which this definitely an example, the game features some deeply beautiful set pieces and some incredible boss battles.
During the latter, the unusual 4:3 display zooms far away from the action, just so that you can see the enormity of the foe you are trying to take down.

I understand if you're a bit burnt-out on schmups but this one is definitely worth your time. 
Moreover, if you prefer your shooters to be more about the shooting than avoiding a million brightly coloured bullets - then you won't be disappointed here.

Sunday, 6 July 2014

MAME Hidden Gems - R is for...

I had very high hopes for R – Looking down my list of candidates I made way back when I played through the MAME catalogue there was a good haul noted here.

A little research has decimated the field though.

I probably should have realised that Ray Force was the first in the popular series that went on to include Ray Storm and Ray Tracers, and re-releases on the Playstation and Xbox (among others) meant I had to eliminate the excellent top-down open world car shooter Rush and Crash (AKA Speed Rumbler) and Rohga Armor Force (AKA Wolf Fang: Kuhga) in which you assemble your own mech before piloting it into H-Shmup action.

All of these games are more than worth a play, but my self imposed selection criteria means that I’ve had to pick others from my list for this entry.

The second and third choices were easy, and probably would have been selected anyway, but up first is Rabbit, a fighting game that I have to recommend with a rather large caveat – The rom is broken.


The main fault is that there is no sound, but there are other issues too, most notably that sprites occasionally blink momentarily into invisibility.

Another point of note is that it just barely squeaks past my criteria – it is a game with a release on console, namely Sega’s much maligned Saturn. However, as it was a Japan only title, and one that happened very close to the launch of the machine, I’ll allow it. On the plus side, this means that if you fall in love with it on MAME you have the option of tracking down a fully functional version.

In it’s favour though, on MAME Rabbit retains a recognisable but innovative fight system and beautiful character art.

Each of the ten highly original combatants come with a 'familiar', a spirit beast that can be summoned and used in combat.
The great thing about this mechanic is that it has both positive and negative effects – A heavy beast might increase the power of your attacks, for example, but it will also slow you down and shorten your jumps.
It adds a dimension I've not before in the genre and, while it may lack the fireworks of others of the era, it has enough going for it to recommend a play to fans of 2D fighters.


Sega's X arcade hardware was most famous for Yu Suzuki's excellent Afterburner and Power Drift games. But it was also the basis for much lesser known Racing Hero.


If you spot the branching pathed map during the attract mode for the game you would be forgiven for expecting Outrun with motorbikes... and in truth there is an element of that when you start playing, but the USP on this one is the structure of the stages.

Each is broken down into 2 elements: The first is Outrun style, racing through traffic to make a checkpoint before the timer runs out.
Make the checkpoint and you're into the second section. The traffic and scenery disappear and are replaced exclusively by other racing bikes and traditional track markings.

At the end of the two sections you're given the choice of two locations to race next, this is why the map on the scoreboard has that classic Sega look.

I don't know if it was the intention to give the impression that you're running late for a race and the first section involves speeding to make it on time - but that's the feeling I get every time I play this game. It's fast and fun, it looks great and has the full on Arcade feel that only comes with Sega's best efforts.


You won't see too many Tetris style games as I run through the alphabet in this blog, but I could not resist the brilliant Risky Challenge - despite it barely squeaking part my criteria.


The game (under it's original name Gussun Oyoyo) was released on SNES, Saturn, and PlayStation and this could have instantly excluded it from selection - were it not for the fact that none of these releases made it outside Japan.

Using elements that will be familiar to anyone who has played either Tetris or Lemmings, you have to build your little egg shaped guy a bridge to the level's exit using blocks that drop in from the top of the stage.
Challenge is added as the timer runs down and the level fills with water, and also by your guy wandering around aimlessly and doing more to help than hinder as you attempt to save his none existent neck.

I don't generally believe that puzzle games are a good fit for the arcade format, but Risky Challenge is an exception to that in a big way.


Obviously S is up next time, none of you guys have heard of Street Fighter 2, right?